

How do I install a catering induction hob?
Aug 28, 2026
Leave a message
Installing a catering induction hob is a significant step for any commercial kitchen looking to upgrade its cooking equipment. As a catering induction hob supplier, I've witnessed firsthand the transformative impact these hobs can have on a kitchen's efficiency and performance. In this blog, I'll guide you through the process of installing a catering induction hob, sharing insights and tips along the way.
Understanding the Basics of Catering Induction Hobs
Before diving into the installation process, it's essential to understand what catering induction hobs are and how they work. Induction hobs use electromagnetic fields to heat cookware directly, rather than relying on a traditional heating element. This results in faster heating times, greater energy efficiency, and more precise temperature control.
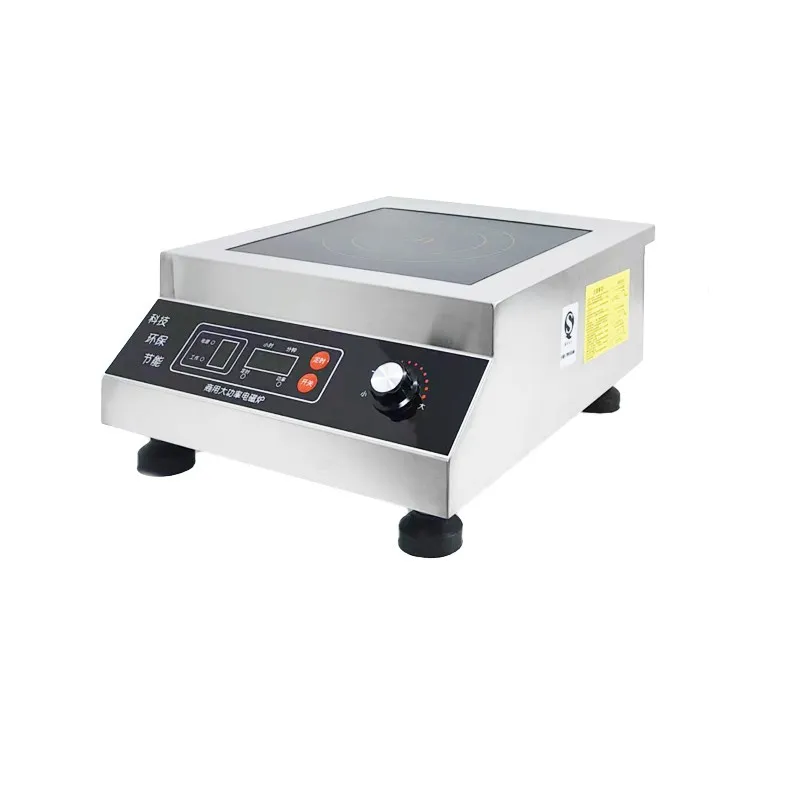

Catering induction hobs are designed for commercial use, which means they are built to withstand heavy usage and high temperatures. They come in a variety of sizes and configurations, allowing you to choose the one that best suits your kitchen's needs. Some popular options include High Power Induction Burner, Highest Watt Induction Cooktop, and Commercial Electric Induction Stove.
Pre-Installation Preparation
The first step in installing a catering induction hob is to prepare your kitchen. This involves assessing the space where the hob will be installed, ensuring that it meets the necessary requirements. Here are some key considerations:
- Power Supply: Induction hobs require a dedicated electrical circuit with the appropriate voltage and amperage. Consult an electrician to determine the specific requirements for your hob and to ensure that your electrical system can handle the load.
- Ventilation: Adequate ventilation is crucial for the safe and efficient operation of an induction hob. Make sure your kitchen has a proper ventilation system in place, such as a range hood or exhaust fan, to remove heat, steam, and odors.
- Countertop: The countertop where the hob will be installed should be made of a heat-resistant material, such as granite, quartz, or ceramic. It should also be level and able to support the weight of the hob.
- Clearance: Leave sufficient clearance around the hob to prevent heat damage to surrounding cabinets and appliances. Refer to the manufacturer's instructions for specific clearance requirements.
Installation Process
Once you've completed the pre-installation preparation, it's time to install the catering induction hob. Here's a step-by-step guide to help you through the process:
- Read the Instructions: Carefully read the installation instructions provided by the manufacturer. Make sure you understand all the steps and safety precautions before proceeding.
- Prepare the Countertop: Measure and mark the location where the hob will be installed on the countertop. Use a template provided by the manufacturer to ensure accurate placement.
- Cut the Countertop: Use a jigsaw or other appropriate tool to cut the countertop according to the markings. Be sure to wear safety goggles and follow all safety precautions.
- Install the Hob: Carefully lower the hob into the cutout in the countertop. Make sure it is level and properly aligned. Connect the electrical wiring according to the manufacturer's instructions.
- Connect the Gas Supply (if applicable): If your hob is a gas-powered model, connect the gas supply using a flexible gas line. Make sure all connections are tight and leak-free.
- Test the Hob: Once the hob is installed and connected, test it to make sure it is working properly. Turn on the power and set the temperature to a low setting. Check for any signs of leaks or malfunctions.
- Finish the Installation: Once the hob is working properly, finish the installation by installing the trim or edge around the hob. This will give the installation a professional look and help to protect the countertop.
Post-Installation Tips
After the catering induction hob is installed, there are a few things you can do to ensure its proper operation and longevity. Here are some post-installation tips:
- Clean the Hob: Regularly clean the hob to remove any food debris, grease, or spills. Use a non-abrasive cleaner and a soft cloth to avoid scratching the surface.
- Use the Right Cookware: Induction hobs require cookware that is made of a magnetic material, such as cast iron or stainless steel. Make sure your cookware is compatible with the hob before using it.
- Follow the Manufacturer's Instructions: Refer to the manufacturer's instructions for specific maintenance and care guidelines. This will help to ensure that your hob operates safely and efficiently.
- Schedule Regular Maintenance: Have your hob serviced regularly by a qualified technician to ensure that it is in good working condition. This will help to prevent any potential problems and extend the lifespan of the hob.
Conclusion
Installing a catering induction hob is a relatively straightforward process that can have a significant impact on your commercial kitchen. By following the steps outlined in this blog and taking the necessary precautions, you can ensure a successful installation and enjoy the benefits of an efficient and high-performance cooking appliance.
If you're interested in purchasing a catering induction hob or have any questions about the installation process, please don't hesitate to contact us. Our team of experts is available to provide you with the information and support you need to make the right decision for your kitchen. We look forward to helping you upgrade your cooking equipment and take your culinary operations to the next level.
References
- Manufacturer's installation instructions
- Electrical codes and regulations
- Ventilation system guidelines
Send Inquiry